Form Accessibility Edits in the Source Code
In certain cases, you will want to go into the source code to update the form and make it more accessible for screen reader users. Common reasons for this would be if you have instructions for the form or multiple choice options that need descriptions for the group of options.
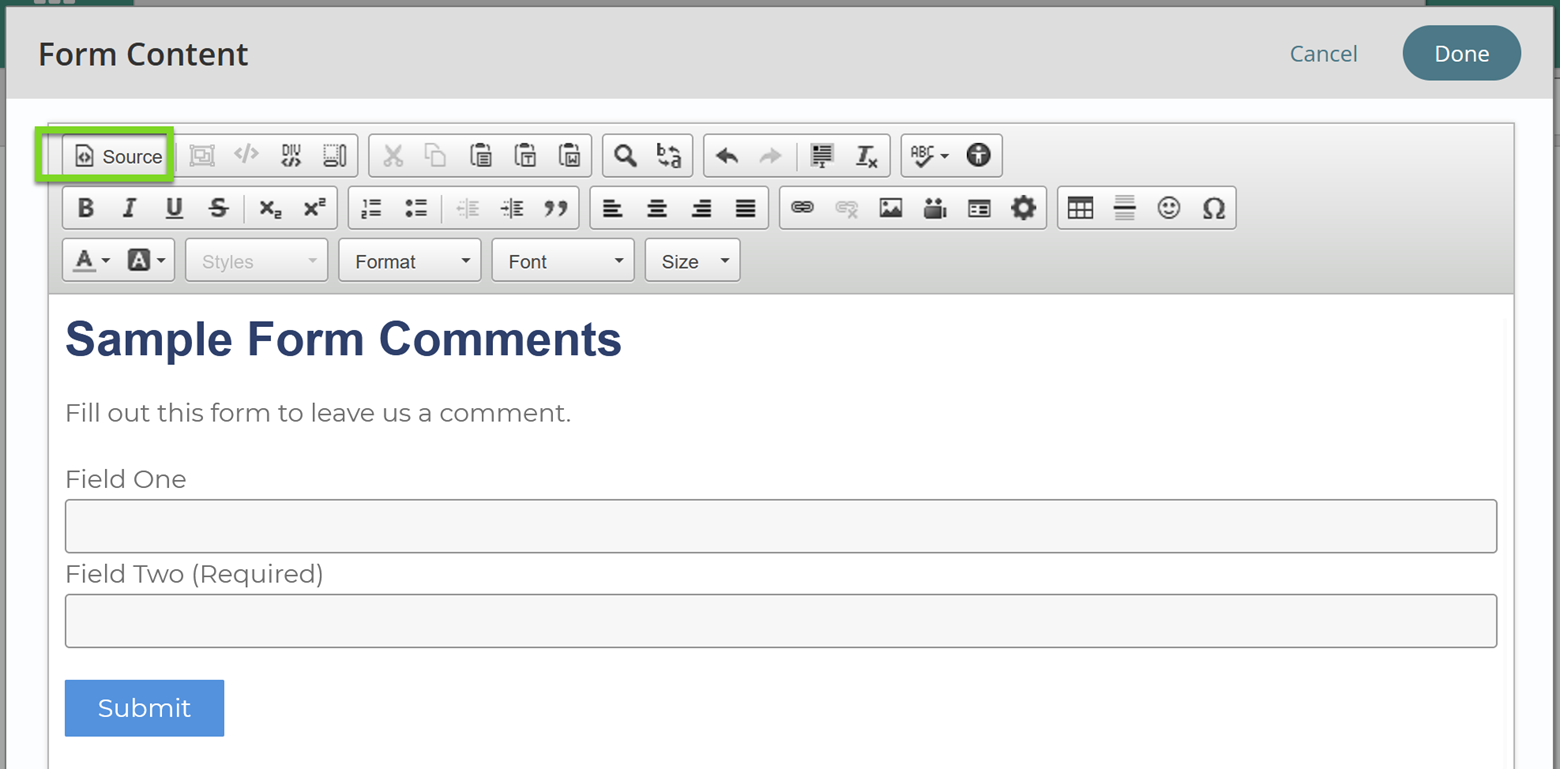
- After adding the necessary inputs using the methods above, hit the Source button in the upper left corner of the Form Editor.
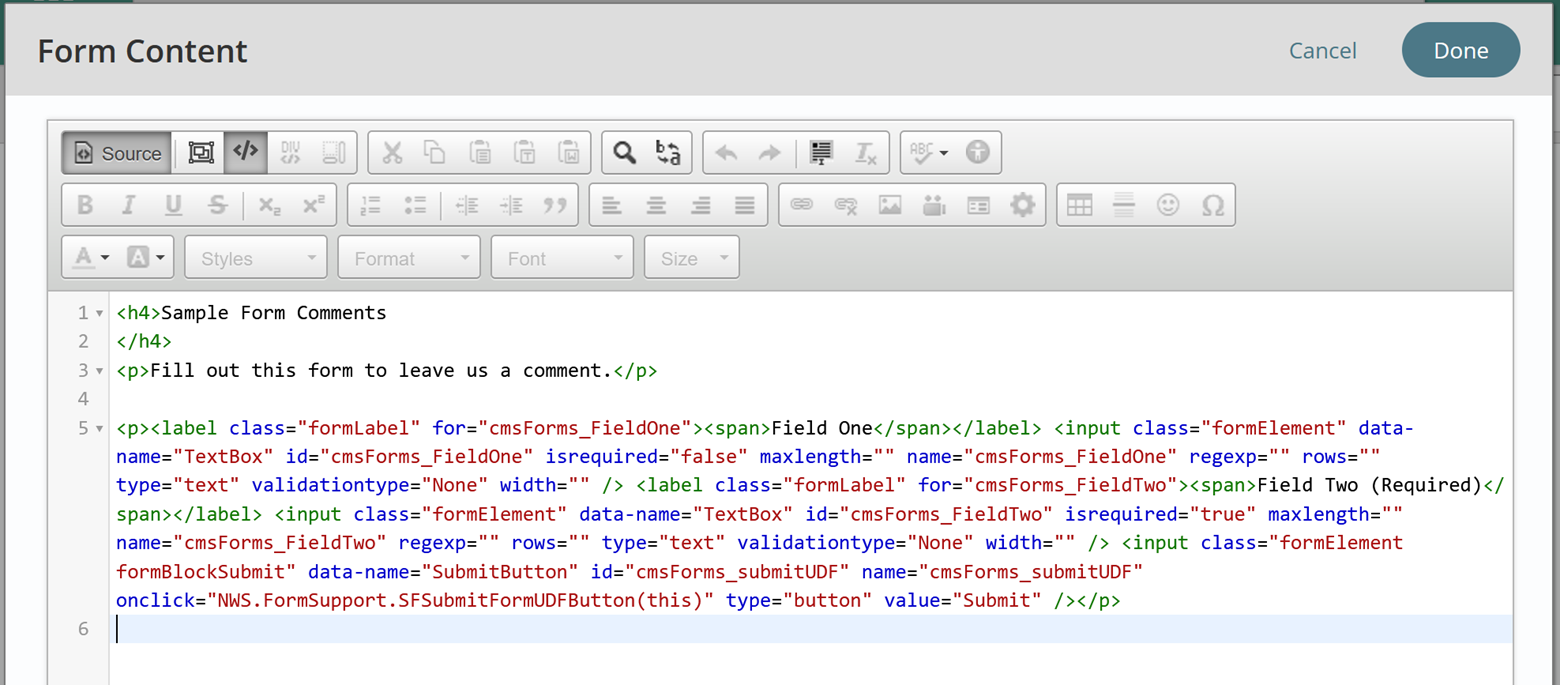
- The source code for the above form would look like:
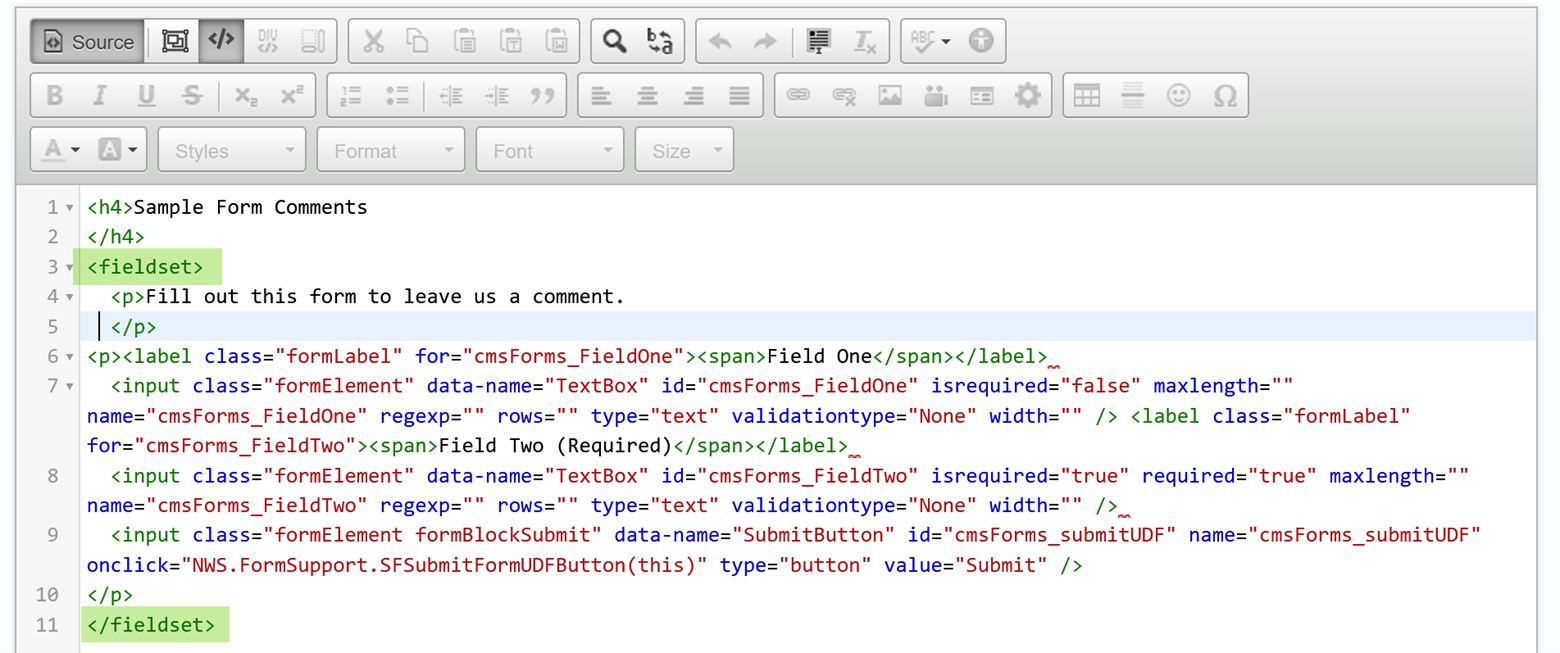
- If you have instructions for the form as a whole that the user should understand before beginning, add a <fieldset> element around the entirety of the instructions and the inputs you created . Insert “<fieldset>” at the start of the form content, the editor should automatically create a closing </fieldset> tag which you will need to move to the end of the content you would like to wrap. What this does is mark the whole form as one associated collection. Use Legend tags to mark the instructions - see below.
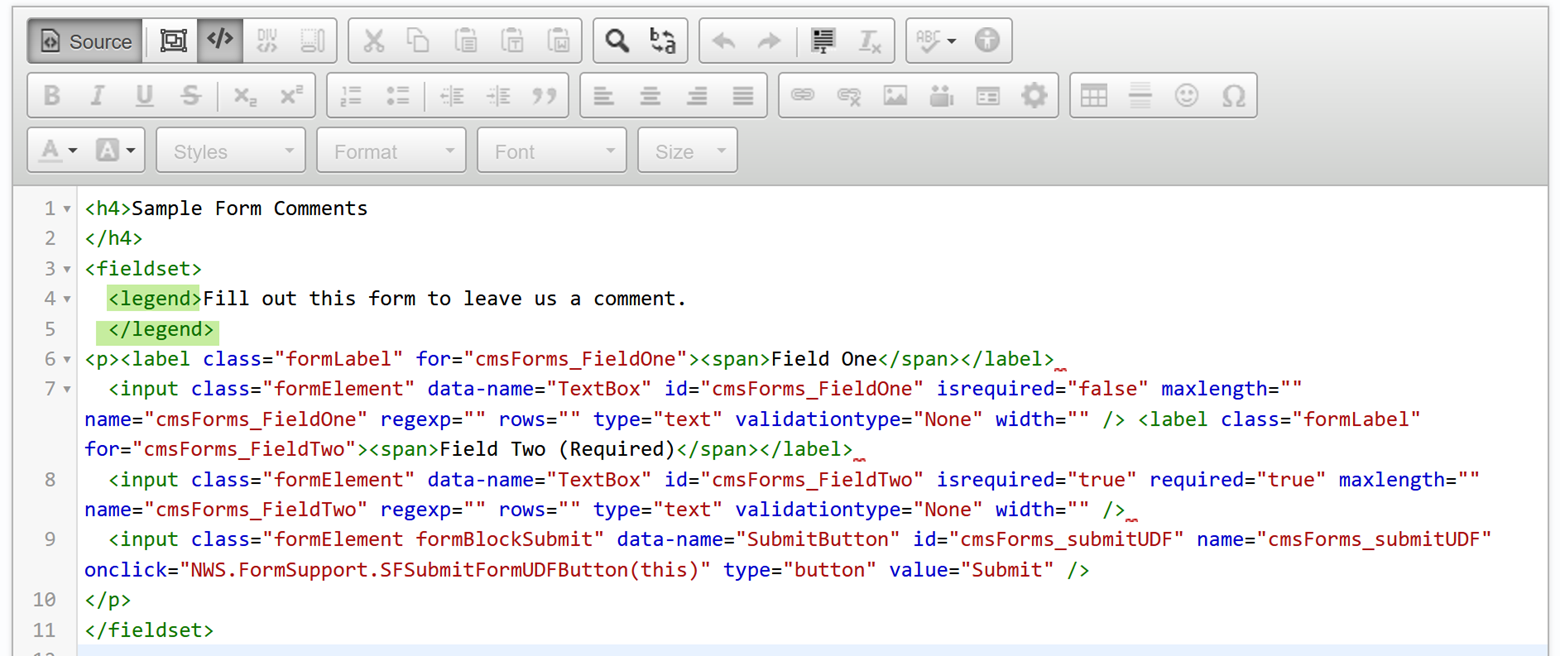
- If you have any instructions for a given fieldset, you will want them to be visible and read by assistive technology as a legend. Put <legend></legend> around the start and end of the instruction text. All instructions and examples should come before they are needed in the form, not as further instructions below or after a field. Legend text may contain breaks (<br/>) but may not be multiple paragraphs (<p></p>).
- You can nest fieldset elements, and should do so if you have multiple choice options in your form. See the instructions for multiple choice fields to learn more.
- A note about source edits: When you enter labels directly in the source code, they do not always appear in the Titan Forms Editor. They do appear on the site, and function correctly. However, especially for fields other than text boxes and fields that contain a paragraph break, the Forms Editor does not always pull that in to populate the label field on the WYSIWYG side of the editor in Titan.
Get Support
Expert Titan CMS Support is just a phone call or email away!
Titan CMS Help Desk
9a.m.-5p.m. CT Mon-Fri
Tel: 414-914-9200
Email: [email protected]